Let Me Share a Little Secret…
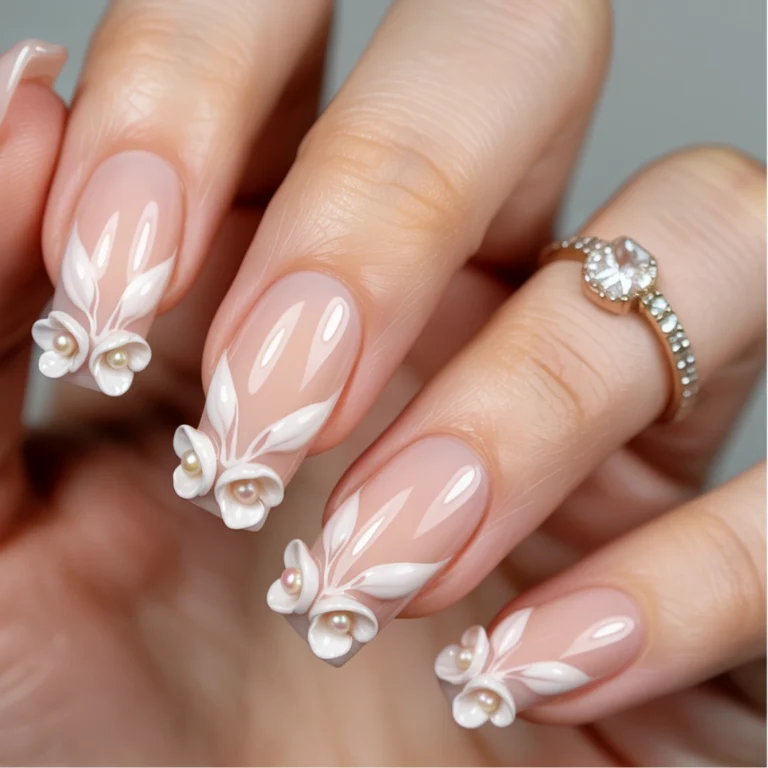
Hey nail besties! 💅 Tiffany here from Polished to Perfection! I just had to hop on today to share something magical with you all. Last week, one of my regular clients came in clutching her phone with this gorgeous Pinterest pic of these dreamy 3D floral nails. Her eyes were literally sparkling when she asked, “Can we do these?”
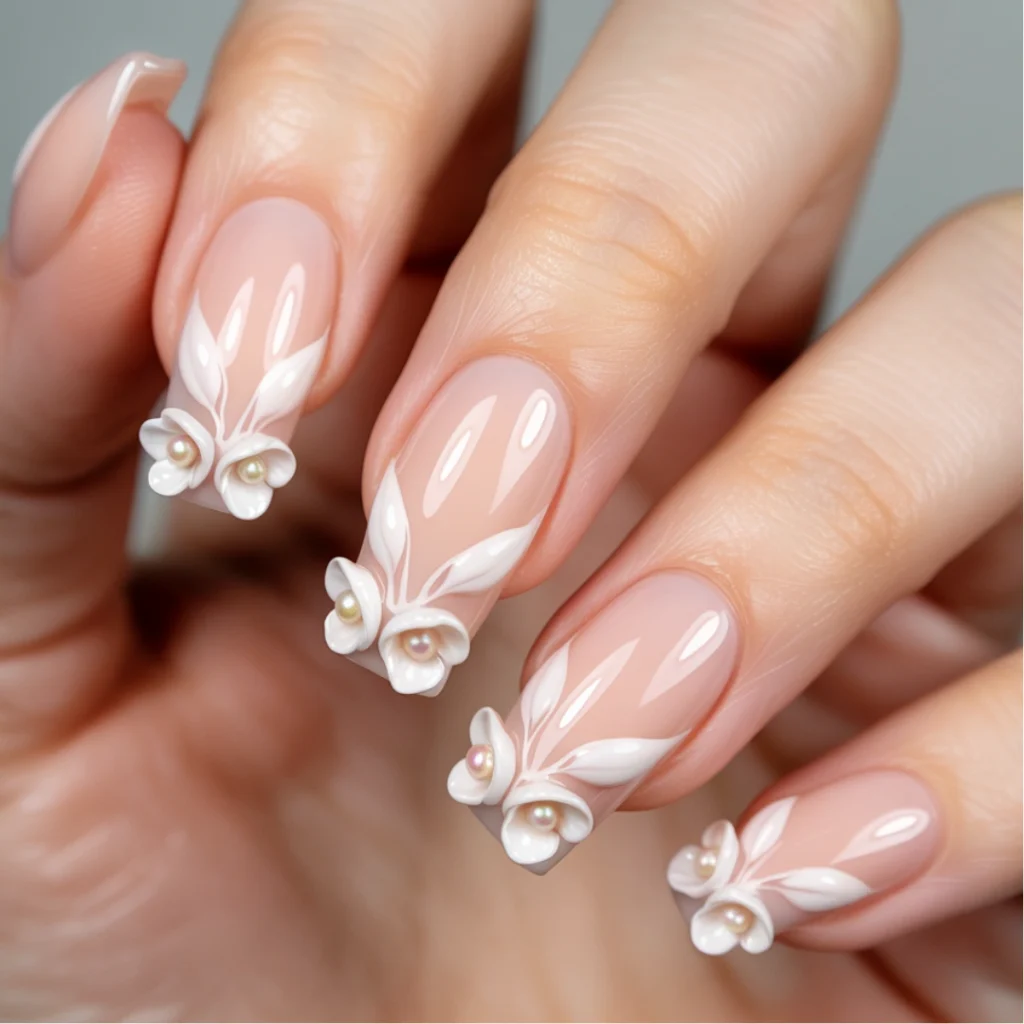
We absolutely nailed it (pun intended 😉), and she loved them so much that I promised I’d share exactly how to recreate these stunning beauties at home! Create stunning 3D dream bloom nails at home! Learn easy techniques and nail art ideas to achieve professional results. Get inspired now! Why spend $60+ at the salon when you can create this dimensional floral fantasy right in your living room?
Have you ever wondered how nail artists create those gorgeous 3D flower effects that seem to literally bloom off the nail? Today, I’m spilling all my professional secrets!
What You’ll Need
Before we dive into creating these gorgeous nail ideas, let’s gather our supplies:
• Nude or soft peach nail polish (base) – I love a peachy tone as it makes the white flowers pop!
• Clear builder gel or thick clear top coat – This is our secret weapon for dimension
• White gel polish or acrylic paint (for 3D flowers) – Either works, but gel gives a smoother finish
• Rhinestones or small pearls – Optional but adds that perfect touch of sparkle
• Dotting tool or toothpick – For creating those perfect petals
• Small flat nail brush – To shape the flowers beautifully
• UV/LED lamp – Essential if using gel products
Pro tip: Set everything up before you start so you’re not scrambling mid-design with wet nails! 🌸
Time Needed
If you’re new to 3D nail designs like this, give yourself about 90 minutes from start to finish. Don’t rush art, honey!
For my nail pros who’ve been around the block with gel nails designs, you can probably knock this out in 45-60 minutes, especially once you get the flower technique down.
Remember: It’s better to take your time and create something gorgeous than rush and be disappointed! 💫
Let’s Do It
Step 1: Prep Those Beautiful Canvases
Start by shaping your nails into a flattering almond or coffin shape – either works beautifully with these floral nail designs! Buff the surface gently to remove shine, then clean with alcohol to remove any oils or dust.
Pro tip: The longer your nails, the more space you’ll have for your blooms, but this design works on medium length too!
Step 2: Lay Down That Perfect Base
Apply two thin coats of your nude or peach polish. This neutral backdrop will make your flower nail designs stand out beautifully! Make sure to cure each layer under your lamp if using gel polish.
Patience pays off here, girlies! A smooth base means smoother 3D elements. ✨
Step 3: Create Dreamy Flower Petals
Now for the fun part! Using your dotting tool or toothpick, place small blobs of white gel polish in circular flower shapes. This is where your nail art designs come alive!
While the gel is still wet, use your flat brush to gently press and drag each blob outward to create those soft, dreamy petal edges. Think of it as creating tiny little cloud shapes that connect in the middle!
Step 4: Build That Gorgeous Dimension
Here’s where the magic happens! Add a tiny bit of clear builder gel over each petal. This creates that pillowy 3D effect that makes these unique nail designs so special!
Be sure to cure after each layer. For more drama, add a second tiny layer of clear gel to the center of each petal for even more dimension.
Step 5: Add That Special Sparkle
Place a tiny rhinestone or pearl in the center of each flower for that perfect finishing touch! This little detail elevates your elegant simple rhinestone nail designs to salon-quality status.
For extra sparkle, you can add a few scattered tiny gems between flowers too! 💎
Step 6: Seal Your Masterpiece
Carefully apply a thin layer of clear gel top coat around (not over!) your 3D elements. This seals everything in place without flattening your dimensional design.
Cure one last time and boom – you just created professional-looking designer nails at home! Look at you go! 👏
Style It Your Way
These dreamy 3D bloom nails pair perfectly with:
• Flowy summer dresses and sandals for that romantic garden party vibe
• Simple white tees and jeans for an elevated everyday look
• Wedding guest outfits (or even as a bride – they make gorgeous bridal nails!)
The neutral base with white flowers works with literally everything in your wardrobe, making these nails incredibly versatile while still being statement-making!
Want to Switch It Up?
• Try pale pink or baby blue flowers instead of white for a sweet pastel twist
• Go bold with ombré petals by mixing white with a touch of color
• Use a glitter base coat for extra sparkle underneath your blooms
• For a more minimalist approach, create just one statement flower on each accent nail
• Not into almond shape? These cute nail designs for short nails work beautifully on squoval nails too!
Help It Last Longer
To keep your 3D dream bloom nails looking fresh:
• Apply cuticle oil daily to keep the skin around your design healthy
• Wear gloves when doing dishes or cleaning to prevent chipping
• Add an extra thin layer of top coat (carefully avoiding 3D elements) every 4-5 days
• Be gentle with the 3D elements – they can catch on hair or fabric
With proper care, these gorgeous nail painting ideas designs can last up to 2-3 weeks!
Before You Go
I hope this tutorial has inspired you to try something new and dimensional with your nail art! Creating these 3D dream bloom nails might take a little practice, but the results are so worth it. Remember that nail art is all about having fun and expressing yourself!
I’d LOVE to see your creations if you try this look – tag me on Instagram or drop a photo in the comments below! And if you’re looking for more inspiration, check out my Summer Nail Trends 2023 post for even more gorgeous ideas!
FAQs
Can I create 3D nail art without a UV lamp?
Yes! While gel gives the best 3D effect, you can use a very thick top coat and quick-dry drops between layers. The effect won’t be as pronounced, but you can still create lovely dimension.
Will the 3D flowers get caught in my hair?
If sealed properly, they shouldn’t catch too badly! Keep the height moderate and make sure edges are smoothed for less snagging.
How long does it take to get good at 3D nail designs?
Like any skill, practice makes perfect! Most beginners see great results by their third attempt. Don’t get discouraged if your first try isn’t salon-perfect!
Can I do this design on natural nails or do I need extensions?
These gorgeous floral designs work beautifully on natural nails as long as they’re at least a bit past your fingertips! The more nail real estate, the more room for creativity.
What’s the difference between 3D nail art and regular nail art?
Regular nail art is flat against the nail, while 3D designs have actual texture and dimension that rises from the nail surface. 3D designs create shadows and have physical depth you can feel!
Happy crafting, nail lovers! 💕💅